Making an email address an Admin gives that mailbox full control over your Titan account, including adding or removing other users. This article shows you how to assign the Admin role from each supported partner panel.
Contents
Before you start
You'll need the login for your hosting partner account (not your Titan email password), and you should already know which email address you want to promote to Admin.
| alert-warning | Admin access is powerful: an Admin can create, edit, or remove any mailbox on this account. Only assign this role to someone you fully trust. |
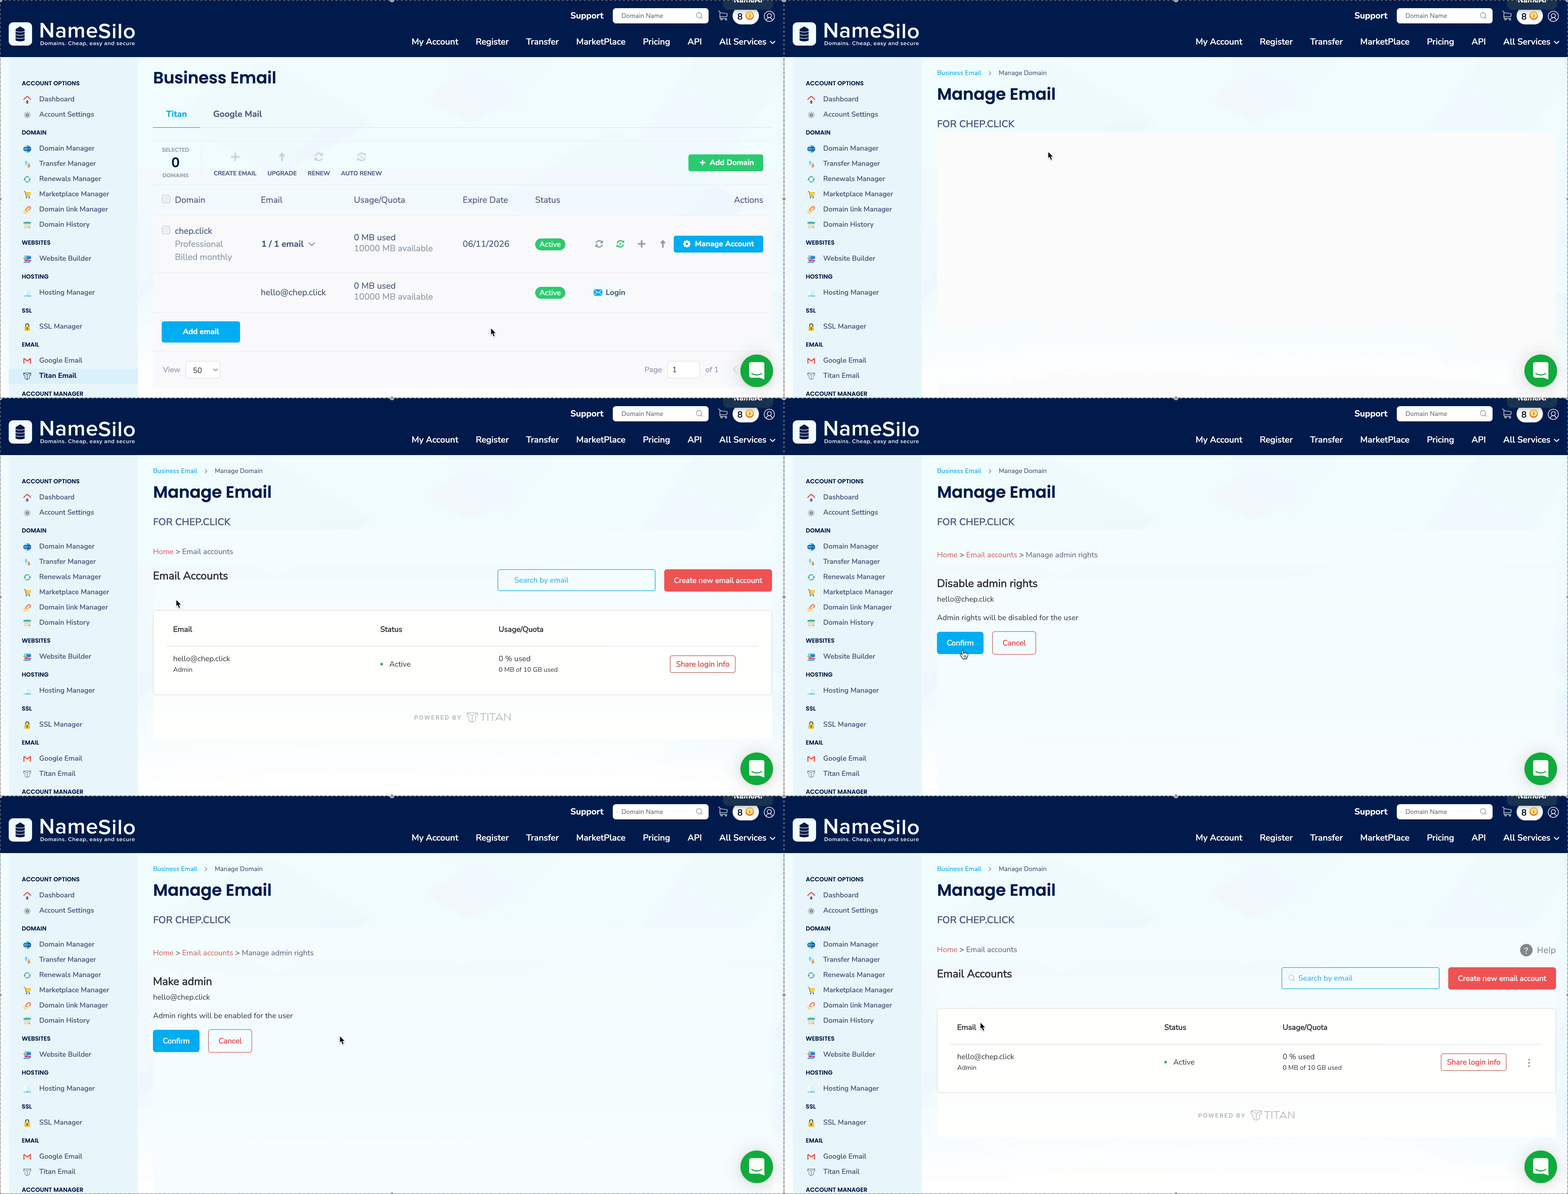
Set up admin access on NameSilo
- Login to your NameSilo Account
- Enter your username and password.
- Open the Titan Email section for your domain.
- Click on Manage Account.
- Go to Email Accounts.
- Select the email address you want to make an admin.
- Enable or assign the Admin role for the email account.
Set up admin access on Hostinger
- Login to your Hostinger hPanel
- Enter your Hostinger username and password.
- Click on Emails.
- Select View Mailboxes.
- Choose the email address that you want to make an admin.
- Enable or assign the Admin role for the selected email account.
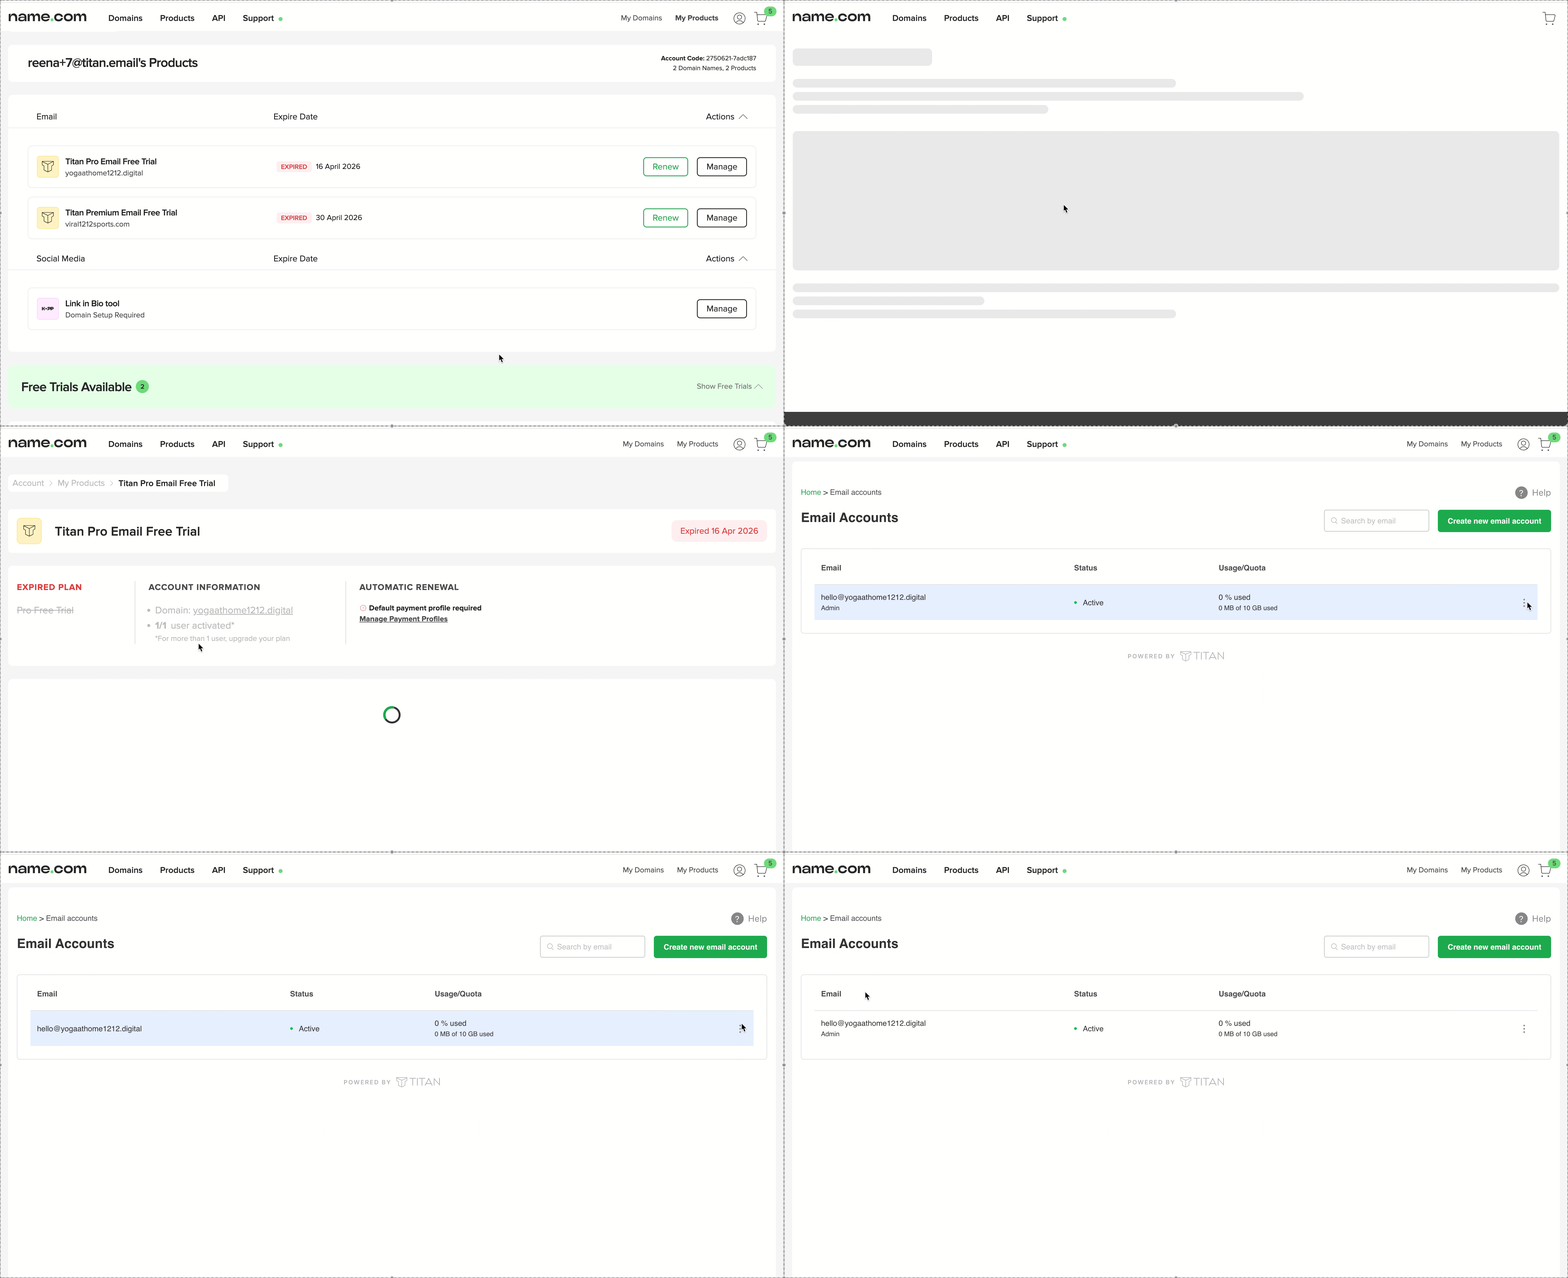
Set up admin access on Name.com Panel
- Login to your Name.com
- Enter your Name.com username and password.
- Click on Emails.
- Choose the email address that you want to make an admin.
- Enable or assign the Admin role for the selected email account.
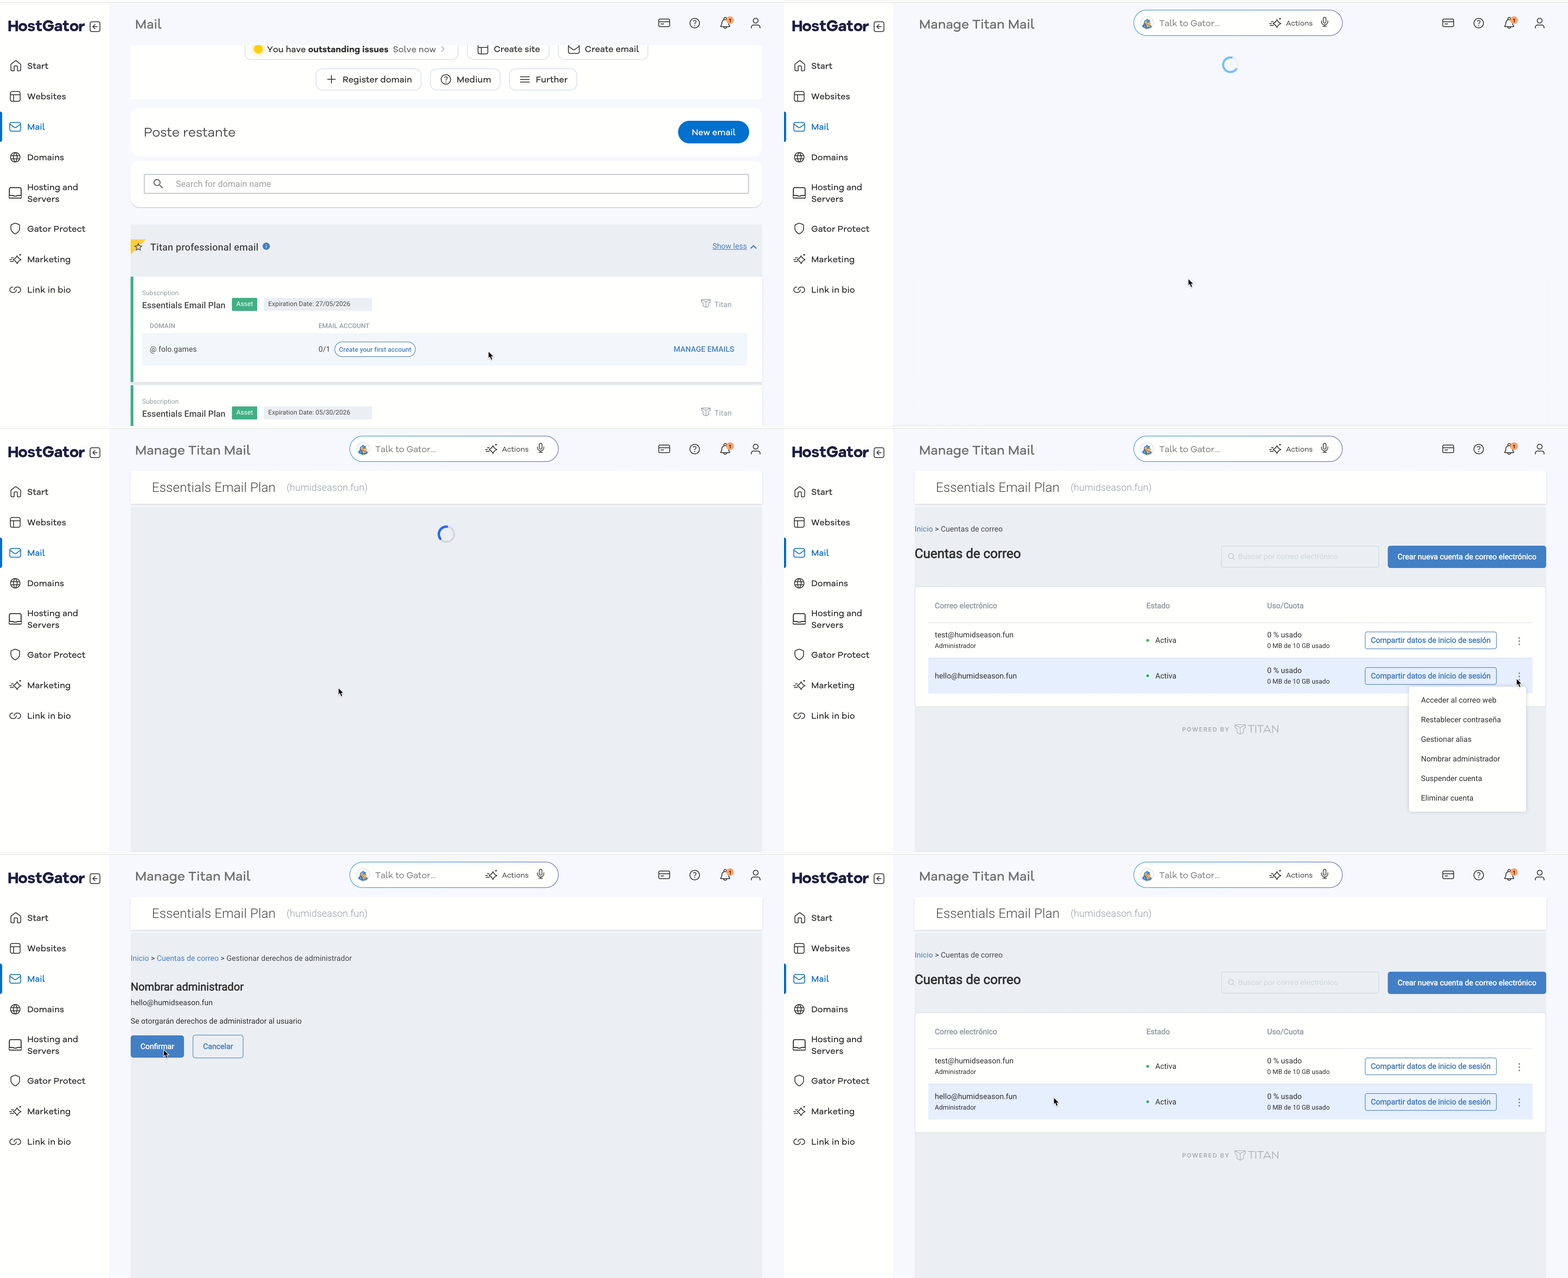
Set up admin access on Hostgator Chile Panel
- Login to your Hostgator
- Enter your Hostgator username and password.
- Click on Emails.
- Choose the email address that you want to make an admin.
- Enable or assign the Admin role for the selected email account.
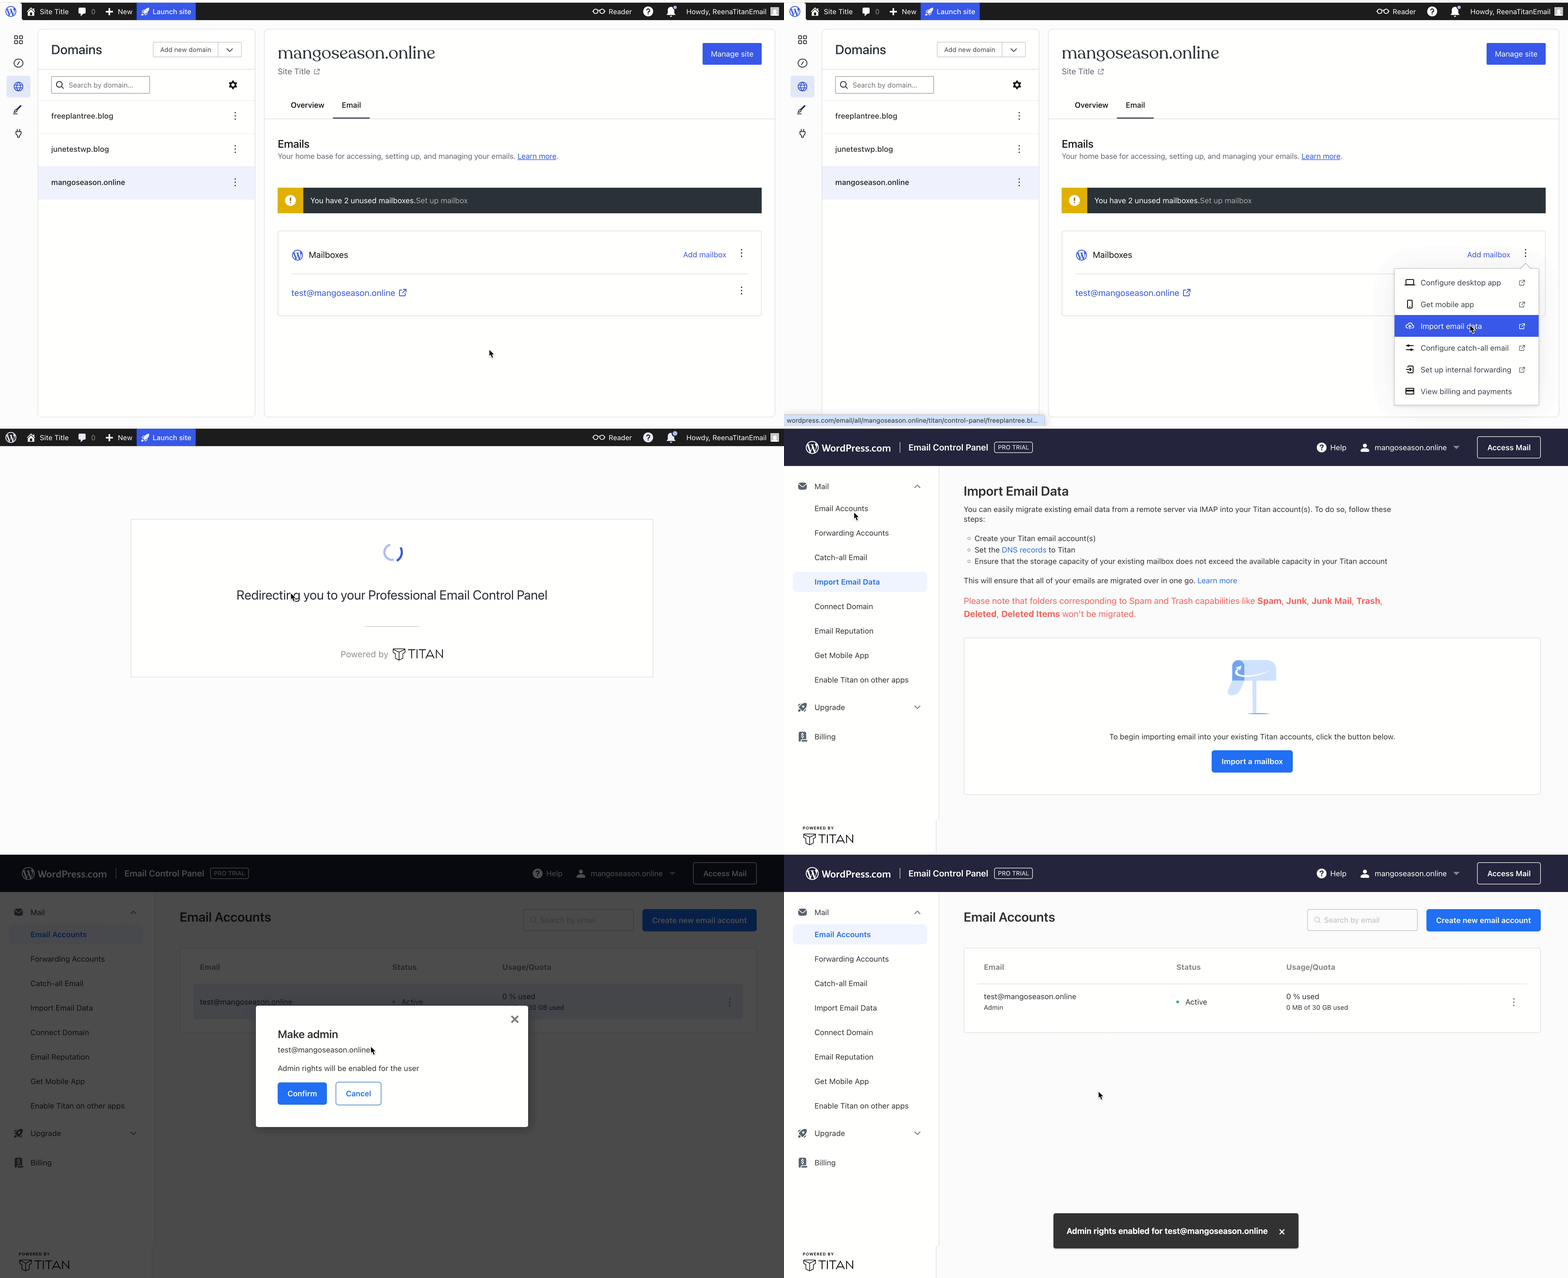
Set up admin access on WordPress Panel
- Login to your WordPress.com Account
- Enter your WordPress username and password.
- Click on the Domains section and select your domain.
- Open the Email section.
- Click the three dots next to any email option.
- You will be redirected to the Titan Admin Panel.
- Once logged in to the Titan Admin Panel, locate the email account that you want to make an admin.
- Click the three dots next to the email account.
- Select the option Make Admin.
What success looks like
Once you've completed the steps for your partner, the email address you selected will be labelled Admin in that partner's panel. That user can now sign in and manage every mailbox and setting on your Titan account.
Troubleshooting
Problem: You don't see an Admin option next to the email address.
Cause: Only an existing Admin can grant the Admin role to another mailbox.
Fix: Ask your current account admin to log in and assign the role, or contact support if you're not sure who the admin is.