In this article, we will walk you through how you can configure an MX record for your domain and set up your Titan Mail account.
| alert-warning |
Titan needs you to verify domain ownership and activate email services by setting MX records & TXT records. Please note: Unverified domains won't be able to receive or send emails. To know more about Domain Verification, click here |
1. Log in to your Namecheap account (click here) and navigate to the Domain List tab.
2. If you own multiple domains, click Manage for the domain you want to send emails from.
| image-shadow | 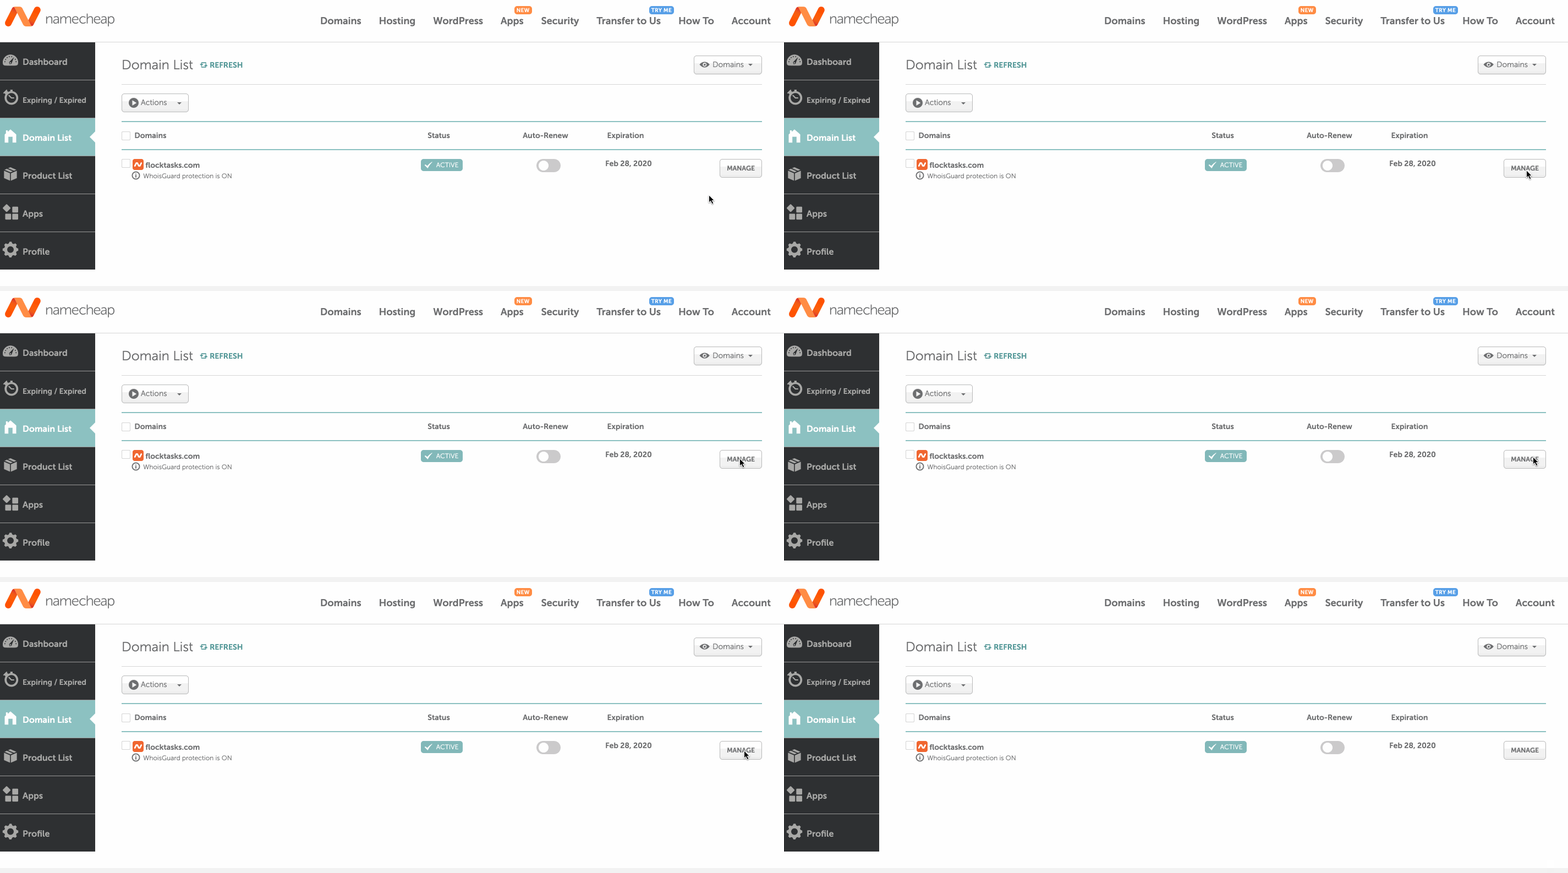 |
3. Click the Advanced DNS tab at the top.
| image-shadow | 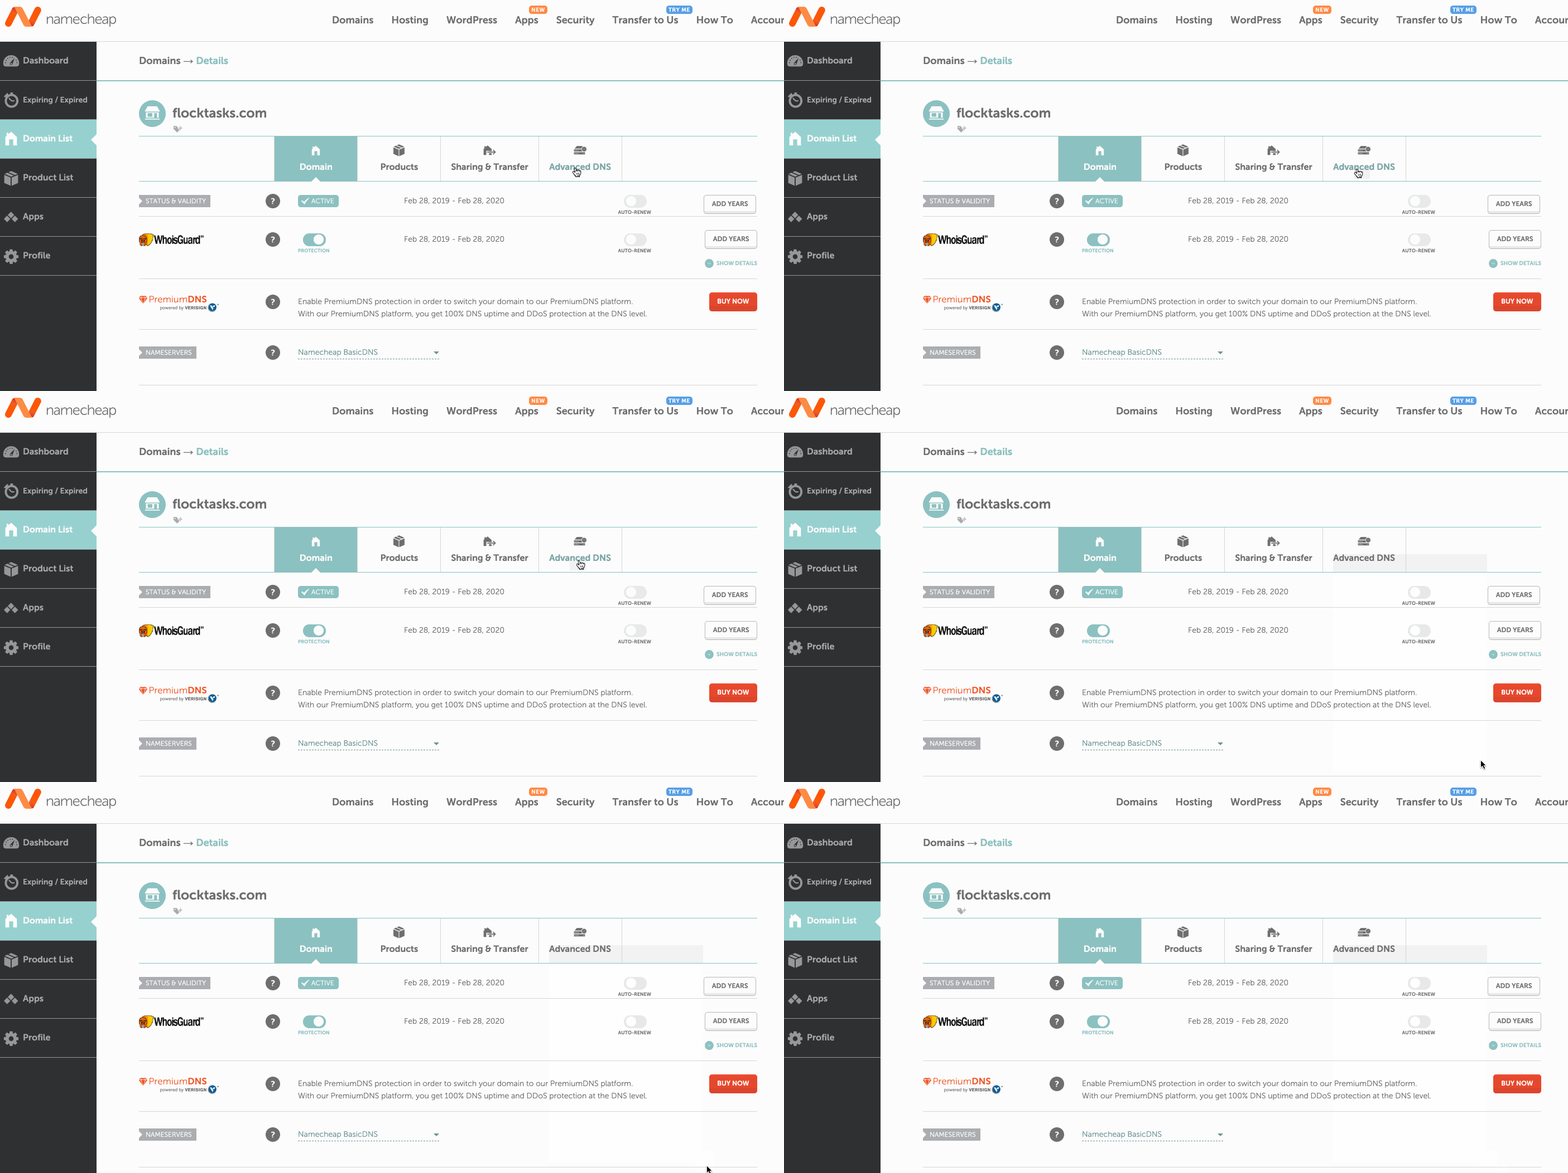 |
4. Scroll down to Mail Settings and select Custom MX
| image-shadow |  |
5. Click Add New Record. Insert the following values (omit the quotes) and click the green checkmark to accept:
- Host: "@".
- Value: "mx1.titan.email".
- Priority: "10" (this column is unlabeled by Namecheap, but it's the field between "Value" and "TTL").
- TTL: 1 min
| image-shadow | 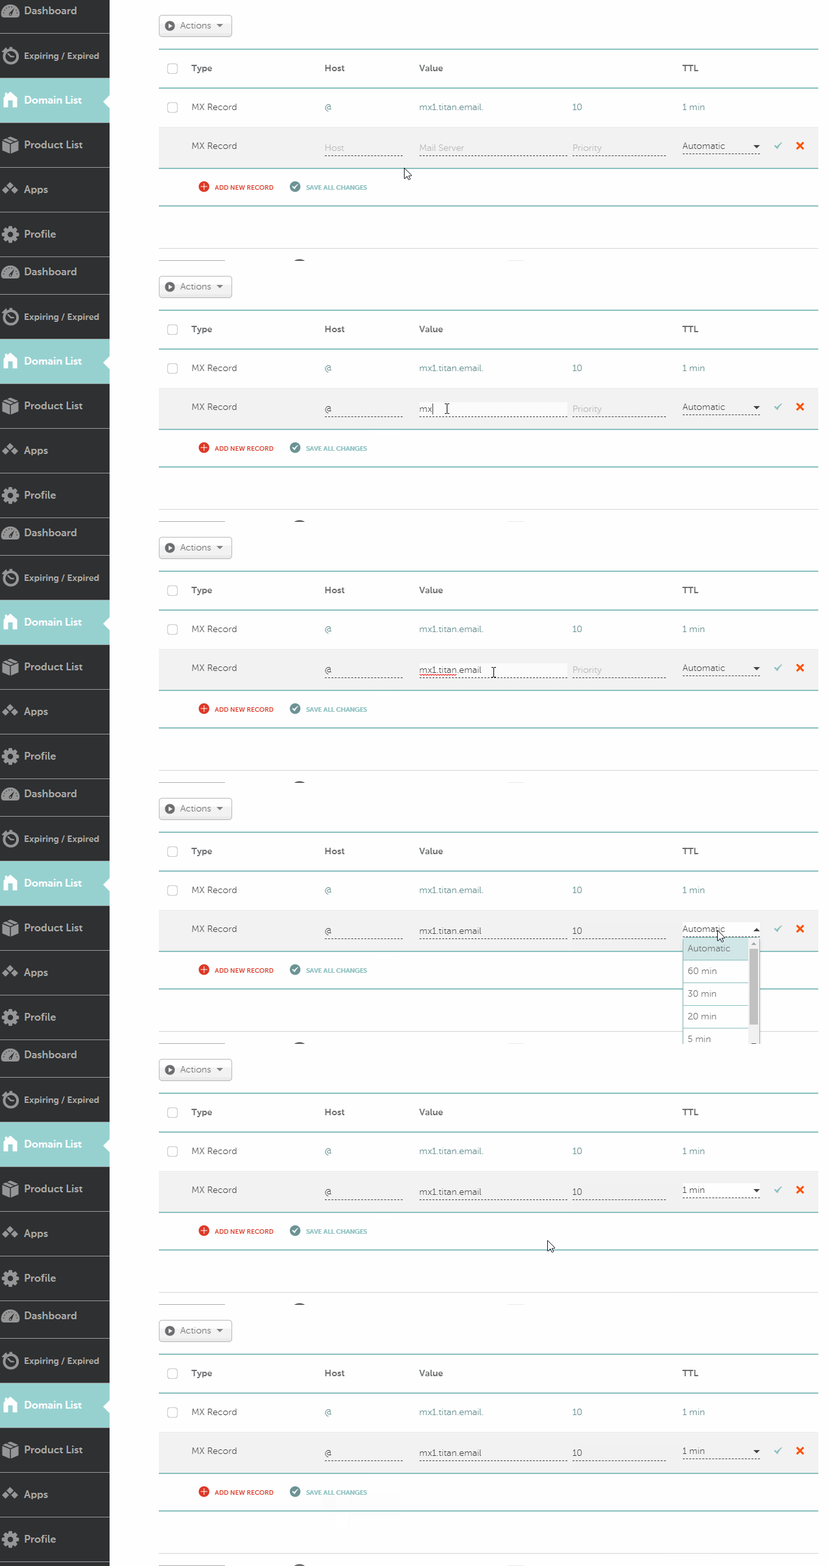 |
6. Follow the same steps as mentioned above and add a second MX record whose values(omit the quotes) are:
- Host: "@".
- Value: "mx2.titan.email".
- Priority: "10" (this column is unlabeled by Namecheap, but it's the field between "Value" and "TTL").
- TTL: 1 min
7. Under Host Records, click Add New Record and add the following values (omit the quotes):
- Record Type: TXT
- Host: "@"
- Value: "v=spf1 include:spf.titan.email ~all"
- TTL: 1 min
| image-shadow | 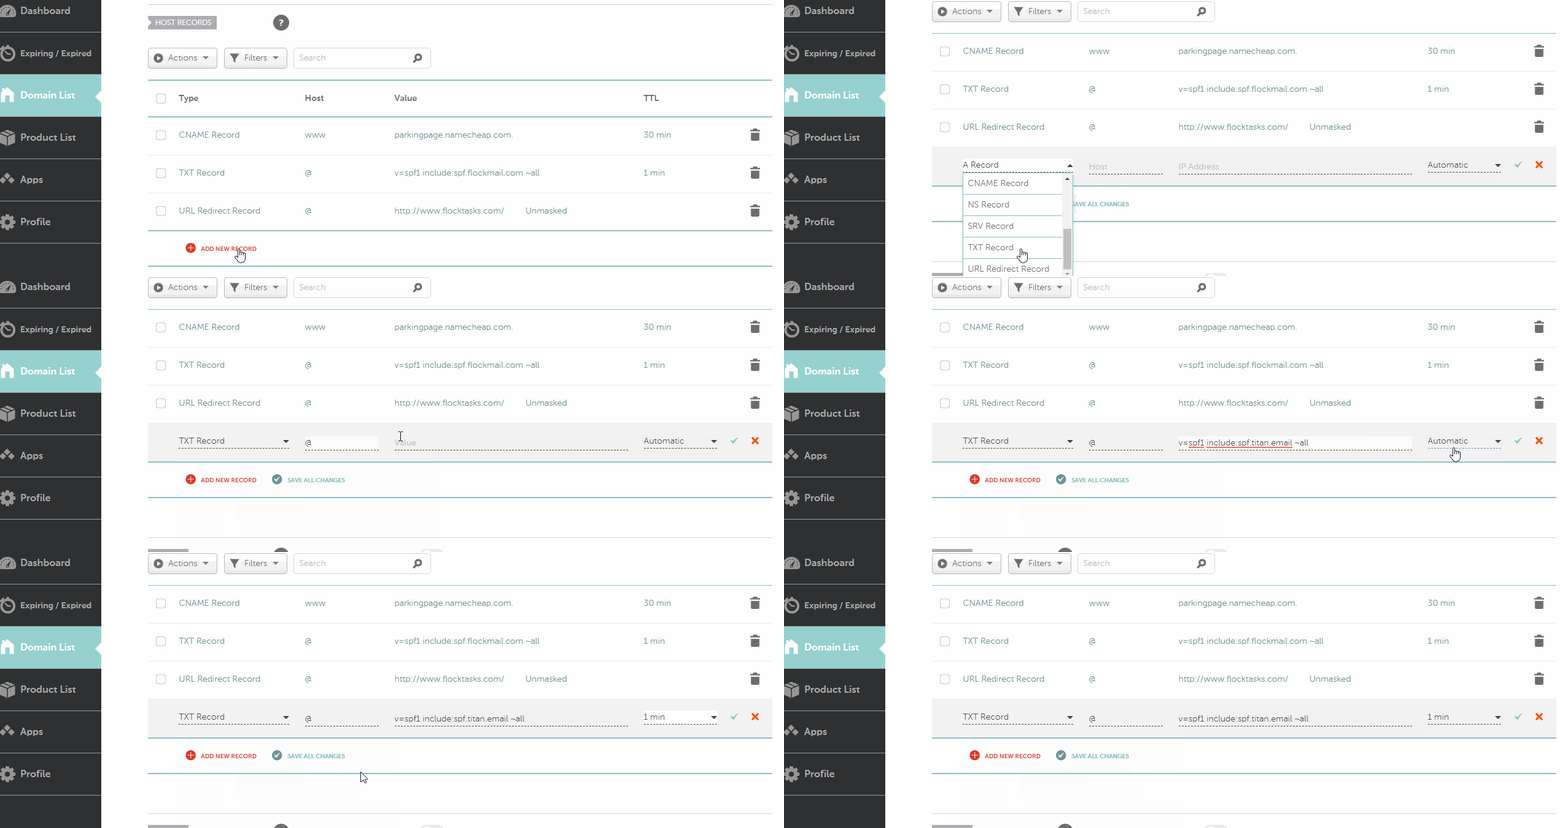 |
Done! You're all set to send and receive emails from your Namecheap domain using Titan Mail!
Feel free to knock on our door by writing to us at support@titan.email in case you need any assistance with configuring these records.
We look forward to having you onboard!